There are several ways to create an arrow using Illustrator CS6. Here are five different methods that will give you a wide variety of arrows to choose from:
- Using the Stroke Panel
- Using Symbols
- Using Glyphs
- Using Brushes
- Using Shapes
Using the Stroke Panel
In Illustrator CS6, turning any line into an arrow with arrowheads and tails is easy.
- Create any line (straight or curved) with two end points.
- With the line selected, open the Stroke panel by choosing Window > Stroke.
- Find the section titled “Arrowheads” and select your arrowhead and tail sections!

Below are some examples of arrows created using the Stroke panel:

Using Symbols
- To use the preset symbols in Illustrator CS6, open the Symbols panel by choosing Window > Symbols.
- In the Symbols panel, open the fly-out menu, choose “Open Symbols Library” and open the Arrows Library.

- From there, just drag and drop your arrows onto your artboard.
Here are some examples of Arrow Symbols:

Note: When you make edits to the symbol on your artboard it will apply the change to the symbol in the library. To prevent this, right-click on the symbol you dragged out and click “Break Link to Symbol” before making any alterations to it.
 Using Glyphs
- You can choose a typeface that contains special arrow characters. To see if a font contains arrow characters, choose Window > Type > Glyphs.
- Select the font at the bottom of the panel and scroll through the glyphs (characters) to search for arrows.

- Create a text box. Double-click the glyph you would like to use and it will appear in the text box.
- To convert the arrow from live text into a graphic icon, select your text box and choose Type > Create Outlines. Converting live text to outlines is important if you would like to edit the text in the same way that you edit objects. For example, you may want to alter the edge of a text character but cannot do so if you don’t convert to outlines.
Here are some examples of arrow glyphs in the typeface Zapf Dingbats:

Using Brushes
- To use the arrow brushes, select Window > Brushes.
- In the panel fly-out menu, choose Open Brush Library > Arrows.

- There are three default arrow libraries in Illustrator CS6 (Special Arrows, Standard Arrows, Pattern Arrows). Open any of the libraries and select any arrow you desire.

- Use the Paintbrush tool and paint your arrow onto the artboard. The arrow will follow the motion of your brush.
Here are some examples of arrow created using the Brush Tool:

Using Shapes
Creating your own custom arrows using shapes is very easy with the help of the Pathfinder tool. Here’s a basic example using simple shapes.
- Start by creating a rectangle and a triangle.

- Position the two so that they overlap slightly and make an arrow shape.

- Open the Pathfinder panel by choosing Window > Pathfinder. Select both shapes and choose Unite in the Pathfinder panel.

- The two pieces have united to become one! This same process can be used with any number of shapes that you create, so get creative!

More Resources
There you have it… five simple methods to give you a variety of arrows for any of your designing needs! If you’d like to learn more about creating Arrows and Arrowheads using Illustrator CS6, check out these great resources:
[Note from Luanne: This is a post from guest blogger, Michael Jarrott, one of the digital media interns working for me here at Adobe.]

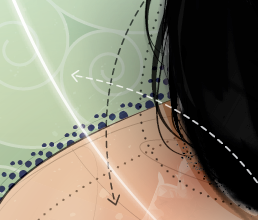
 If you are looking for a way to create a paper-cut look with digital tools, check out this Paper Cut tutorial. Using a combination of hand sketching and Adobe Illustrator, Adobe senior designer Lidia Lukianova walks you through just a few simple steps to get this stunning effect. Her example shows a beautiful letterform but I’m sure you could use this technique with illustrations or icons just as effectively.